Changing a trailer tire may seem simple, but it’s a task that can quickly turn stressful if you’re not prepared. Many people don’t realize that trailer tires and car tires are not exactly the same. Trailer tires often support more weight and face different road stresses.
Whether you’re towing a boat, camper, or utility trailer, knowing how to change a trailer tire safely and efficiently is an essential skill. Getting stuck on the side of the road with a flat is never fun, but with the right approach, you can get back on your way quickly and safely.
Why Changing A Trailer Tire Is Different
You might think changing a trailer tire is just like changing a car tire. In reality, there are important differences. Trailer tires are often set up with different lug nut torque, may use different types of jacks, and can be harder to access, especially if the trailer is loaded. Ignoring these differences can lead to mistakes that could damage your trailer or put you at risk on the road.
Another factor is that trailers often sit for long periods, making their tires more likely to dry-rot or lose air pressure. That means even if you don’t use your trailer often, you should be ready for a flat.
What You Need Before You Start
Before you begin, it’s important to have the right tools and supplies. Missing one small tool can make the process much harder, especially if you’re far from help.
Essential tools and supplies:
- Spare trailer tire – Make sure it’s properly inflated and in good condition.
- Lug wrench or tire iron – It must fit your trailer’s lug nuts.
- Heavy-duty jack – Not all car jacks will work for trailers, especially loaded ones.
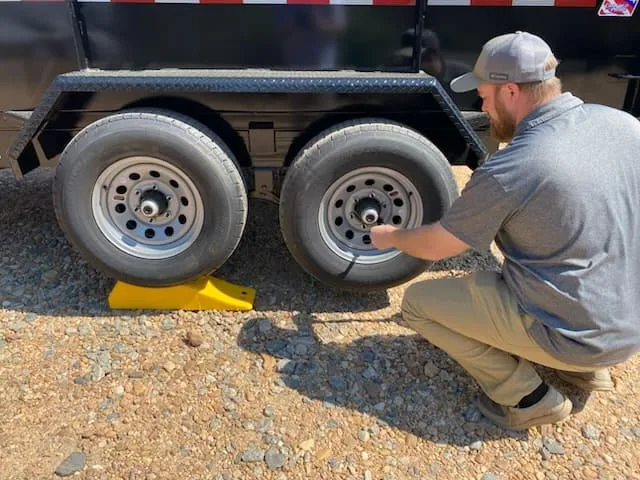
- Wheel chocks – To prevent the trailer from rolling.
- Gloves – For hand protection.
- Flashlight – In case you need to change a tire in the dark.
- Blocks or wood – To help stabilize the jack on soft or uneven ground.
- Torque wrench – For proper tightening of lug nuts.
- Reflective safety triangles or flares – For visibility on the roadside.
Pro tip: Check your spare tire every few months. Many people forget, only to find it flat when they need it most.
Safety First: Preparing For The Change
Safety is your number one priority. Trailers are heavy, and improper lifting can cause injuries or trailer damage. Before you do anything:
- Pull off the road to a safe, flat area away from traffic.
- Turn on your vehicle’s hazard lights.
- Place wheel chocks on the trailer’s opposite side tires.
- Set up your reflective triangles behind the trailer for visibility.
If you’re on a slope, position the trailer so it won’t roll. Never try to change a tire on a hill or soft shoulder if you can avoid it.
Step-by-step Guide To Changing A Trailer Tire
Let’s break down the process into clear, actionable steps. Each detail matters—missing a step can lead to mistakes that might put you at risk.
1. Loosen The Lug Nuts
Before lifting the trailer, use your lug wrench to slightly loosen each lug nut on the flat tire. Don’t remove them yet—just break their initial resistance. This is much easier while the wheel is still on the ground.
2. Position The Jack
Place your jack under the trailer frame, as close to the flat tire as possible. Never put the jack under the axle unless your trailer’s manual says it’s safe. Many axles are not designed to hold the trailer’s weight at a single point.
Tip: Put a block of wood under the jack if the ground is soft to prevent sinking.
3. Lift The Trailer
Slowly raise the trailer until the flat tire is a few inches off the ground. Make sure the trailer is stable before moving to the next step. If the trailer wobbles, lower it and reposition the jack.
4. Remove The Lug Nuts And Tire
Now, finish unscrewing the lug nuts by hand or with the wrench. Put them in a safe place so they don’t roll away. Carefully pull the flat tire straight off the hub.
5. Mount The Spare Tire
Line up the holes in the spare tire with the wheel studs. Push the spare onto the hub, making sure it sits flush. Replace the lug nuts and tighten them by hand as much as you can.
6. Lower The Trailer
Slowly lower the trailer back to the ground. Remove the jack once the tire is fully supporting the trailer’s weight.
7. Tighten Lug Nuts Properly
Use your torque wrench to tighten the lug nuts to the manufacturer’s recommended specification. Tighten in a star pattern—not in a circle—to help the wheel seat evenly.
Non-obvious insight: Many trailer tire failures happen because lug nuts are not torqued correctly. Too loose, and the wheel can wobble or come off. Too tight, and you may damage the studs.
8. Pack Up And Check Everything
Pick up all your tools and double-check that nothing is left behind. Look over the replaced tire and make sure it’s seated properly and fully inflated.
Extra tip: After driving 25-50 miles, stop and check the lug nut tightness again. Trailer wheels can settle after the first few miles.
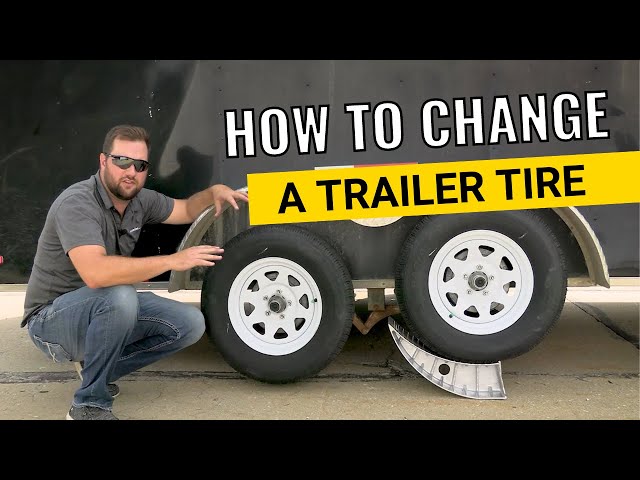
Credit: www.youtube.com
Common Mistakes To Avoid
Changing a trailer tire is not difficult, but even experienced drivers make avoidable mistakes.
- Using the wrong jack – Many small car jacks can’t safely lift loaded trailers.
- Not blocking the wheels – Trailers can roll easily if not chocked, especially when unhooked from the vehicle.
- Skipping the torque wrench – Hand-tightening is not enough for trailer wheels.
- Forgetting to check tire pressure – A spare tire that’s flat or underinflated is useless.
- Ignoring your surroundings – Changing a tire too close to traffic is dangerous; always move to a safe spot if possible.
How Trailer Tires Differ From Car Tires
Trailer tires, usually marked ST (Special Trailer), are designed for heavy loads and stability, not for steering or stopping like car tires. They often have stiffer sidewalls and different tread patterns.
Here’s a quick comparison:
| Feature | Trailer Tire (ST) | Car Tire (P) |
|---|---|---|
| Load Capacity | Higher, supports more weight | Lower, designed for comfort |
| Sidewall Strength | Stiffer for stability | Softer for ride comfort |
| Speed Rating | Lower (often 65-75 mph) | Higher (90+ mph) |
| Tread Design | Minimizes sway | Maximizes grip |
Non-obvious insight: Never use car tires on a trailer. They can overheat and fail under trailer loads, even if they fit the wheel.
When To Replace Your Trailer Tire
Knowing when to change your trailer tire is just as important as knowing how. Trailer tires generally last 3–5 years, even if they look good. Rubber breaks down from age, UV, and sitting still.
Signs you need a new tire:
- Cracks in the sidewall
- Tread depth less than 2/32 inch
- Uneven wear
- Bulges or blisters
- Repeated loss of air pressure
Here’s a table showing average trailer tire lifespan by type:
| Tire Type | Average Lifespan | Maximum Mileage |
|---|---|---|
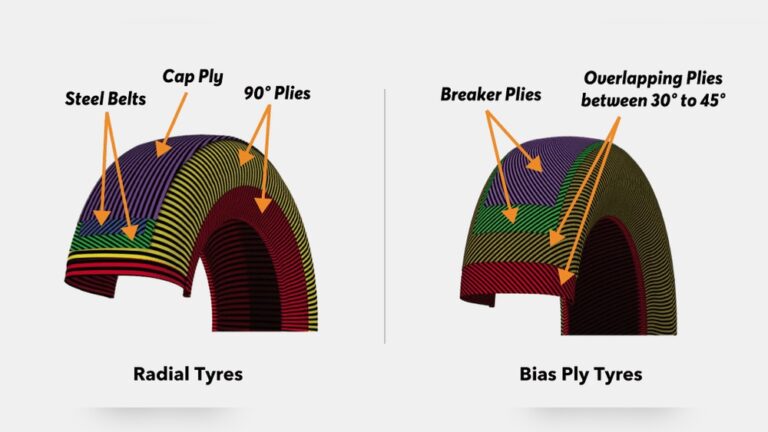
| Bias-ply | 3 years | 12,000 miles |
| Radial | 5 years | 20,000 miles |
| Heavy-duty | 5–7 years | 30,000 miles |
How To Choose The Right Replacement Tire
When it’s time to replace, don’t just grab any tire that fits. Trailer tires come in different sizes, load ranges, and types.
Key factors to check:
- Size: Should match the original tire or manufacturer’s recommendation.
- Load rating: Must meet or exceed your trailer’s needs.
- Type: Radial for highway use, bias-ply for off-road or heavy loads.
- Speed rating: Make sure it matches your travel speeds.
If you’re not sure, check the trailer’s manual or the sidewall of your current tire.

Credit: kempoutside.com
Quick Reference: Steps To Change A Trailer Tire
Sometimes, you just need a fast reminder. Here’s a summary:
- Park safely and secure the trailer.
- Loosen lug nuts.
- Jack up the trailer.
- Remove flat tire.
- Mount spare tire.
- Lower trailer.
- Tighten lug nuts in a star pattern.
- Recheck lug nuts after driving.
Keep this list in your glove compartment or phone for emergencies.
Maintenance Tips To Avoid Flats
Prevention is always better than repair. Regular trailer maintenance can help you avoid most roadside tire changes.
- Check tire pressure monthly and before every long trip.
- Inspect for damage or cracks, especially after storage.
- Rotate tires every 5,000 miles if possible.
- Keep spares covered to block sun and weather.
- Balance wheels for smoother towing and less wear.
Experience-based tip: Trailer tires degrade faster from sitting than from use. If your trailer sits for months, check them carefully before every trip.
For more on trailer tire care, the National Highway Traffic Safety Administration offers useful guidelines.
Credit: www.kenfeagintruckandtrailer.com
Frequently Asked Questions
How Tight Should I Make Trailer Lug Nuts?
You should use a torque wrench to tighten lug nuts to the trailer manufacturer’s specification, often between 90–120 ft-lbs. Over-tightening or under-tightening can cause wheel problems.
Can I Use A Car Jack To Lift My Trailer?
A car jack may work for small, empty trailers, but it’s often not strong enough for loaded or heavy trailers. Always use a heavy-duty jack rated for your trailer’s weight.
How Do I Know What Size Spare Tire I Need?
Check your trailer’s manual or the sidewall of your current tire for the correct size. Sizes are usually printed as a combination of numbers and letters, like ST205/75R15.
What Should I Do If My Spare Tire Is Flat?
Never install a flat spare. Repair or inflate it before use. If you don’t have a working spare, call for roadside assistance or a mobile tire service.
How Often Should Trailer Tires Be Replaced?
Even if they look good, replace trailer tires every 3–5 years. Look for signs of aging, such as cracks or sidewall damage, and replace immediately if found.
—
Changing a trailer tire is a skill every trailer owner should master. With the right tools, a little practice, and attention to detail, you can handle flats confidently—no matter where the road takes you. Remember, being prepared is just as important as knowing the steps.
Safe travels!